I have created diagram which shows how Director deployed services in RHOSP 10. That is something like summary for “UNDERSTANDING RED HAT OPENSTACK PLATFORM HIGH AVAILABILITY” guide. If you learning RHOSP it would be useful.
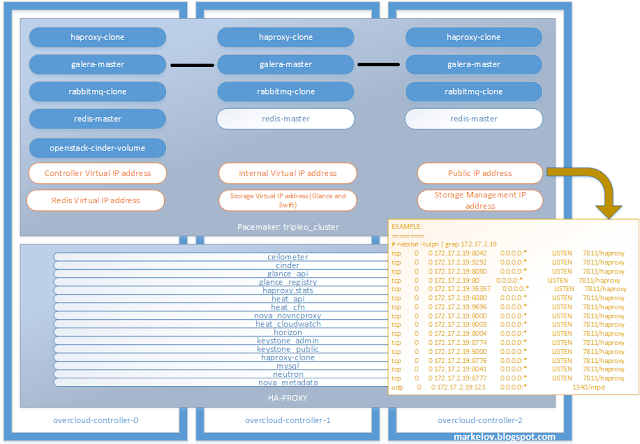
I have created diagram which shows how Director deployed services in RHOSP 10. That is something like summary for “UNDERSTANDING RED HAT OPENSTACK PLATFORM HIGH AVAILABILITY” guide. If you learning RHOSP it would be useful.
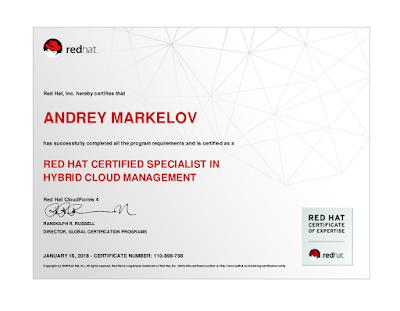
I have received the results for EX220 Red Hat Certified Specialist in Hybrid Cloud Management today. Now I have Red Hat Certified Architect Level X.
This blog post describes the way to prepare a small lab in virtual environment intended for TripleO (Director) OpenStack deployment tool learning. This is a quick instruction. For deep understanding and command exploration use documentation.
I used my home laptop with 16 Gb of memory and CentOS 7.3 on the top of it for the lab environment hardware and RHEL 7.3 and RHOPS 10 for virtual machines, but these instructions should be applicable for RDO OpenStack distribution with minor changes.
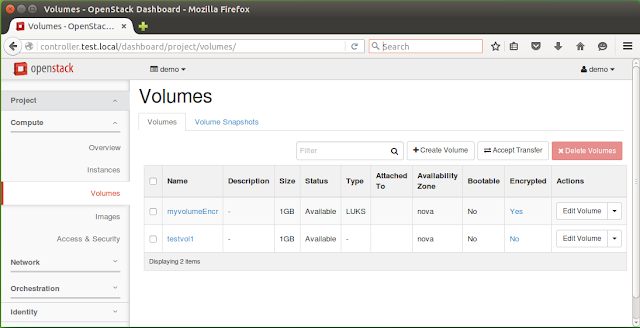
Одной из полезных опций работы с блочными устройствами является их шифрование. Настройка шифрования томов требуется со стороны двух служб: Nova и Cinder. Сделать это можно при помощи общего секрета или при помощи сервиса управления ключами Barbican. Пойдем по пути использования общего секрета. Нужно иметь в виду, что если он скомпрометирован, то злоумышленник получит доступ ко всем зашифрованным томам.
Зададим ключ на узле Cinder и всех вычислительных узлах:
[root@compute ~]# crudini --set /etc/nova/nova.conf keymgr fixed_key 123456789
[root@compute ~]# systemctl restart openstack-nova-compute
[root@controller ~]# crudini --set /etc/cinder/cinder.conf keymgr fixed_key 123456789
[root@controller ~]# systemctl restart openstack-cinder-volume
Нам необходимо создать новый тип тома. Назовем его LUKS, поскольку для шифрования будет использоваться соответствующая спецификация:
Зачастую перед администратором встает задача отладки приложений в вашей виртуальной сети OpenStack, и тогда возникает необходимость воспользоваться стандартными привычными инструментами наподобие tcpdump и Wireshark.
Запустим один экземпляр виртуальной машины:
$ nova boot –flavor m2.tiny –image cirros-raw –key-name demokey1 –security-groups demo-sgroup test-vm
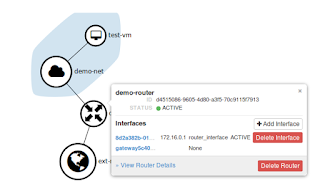
Далее, определив на каком из вычислительных узлов запустилась виртуальная машина, посмотрим топологию Open vSwitch:
[root@compute-opt ~]# ovs-vsctl show
20eab69c-e759-41b0-a480-97688ec0b4b8
Bridge br-int
fail_mode: secure
Port “qvobee51cf7-fb”
tag: 1
Interface “qvobee51cf7-fb”
Port patch-tun
Interface patch-tun
type: patch
options: {peer=patch-int}
Port br-int
Interface br-int
type: internal
Bridge br-tun
fail_mode: secure
Port “gre-c0a87adc”
Interface “gre-c0a87adc”
type: gre
options: {df_default=“true”, in_key=flow, local_ip=“192.168.122.215”, out_key=flow, remote_ip=“192.168.122.220”}
Port br-tun
Interface br-tun
type: internal
Port “gre-c0a87ad2”
Interface “gre-c0a87ad2”
type: gre
options: {df_default=“true”, in_key=flow, local_ip=“192.168.122.215”, out_key=flow, remote_ip=“192.168.122.210”}
Port patch-int
Interface patch-int
type: patch
options: {peer=patch-tun}
ovs_version: “2.4.0”